How to make a family tree poster that's worth framing
A good family tree poster is half research project, half design project. Here's how to do both well, in an evening or two, without the result looking like a spreadsheet.
1. Decide who the poster is for
Before you collect a single name, decide whose story the poster tells. That one decision determines which chart you need, which names you have to find and how big the page has to be.
- Looking forward from a couple: a gift for grandparents' anniversary, or a poster for a family reunion, is usually about everyone who came after them: children, their partners, grandchildren, maybe great-grandchildren. That's a descendant tree.
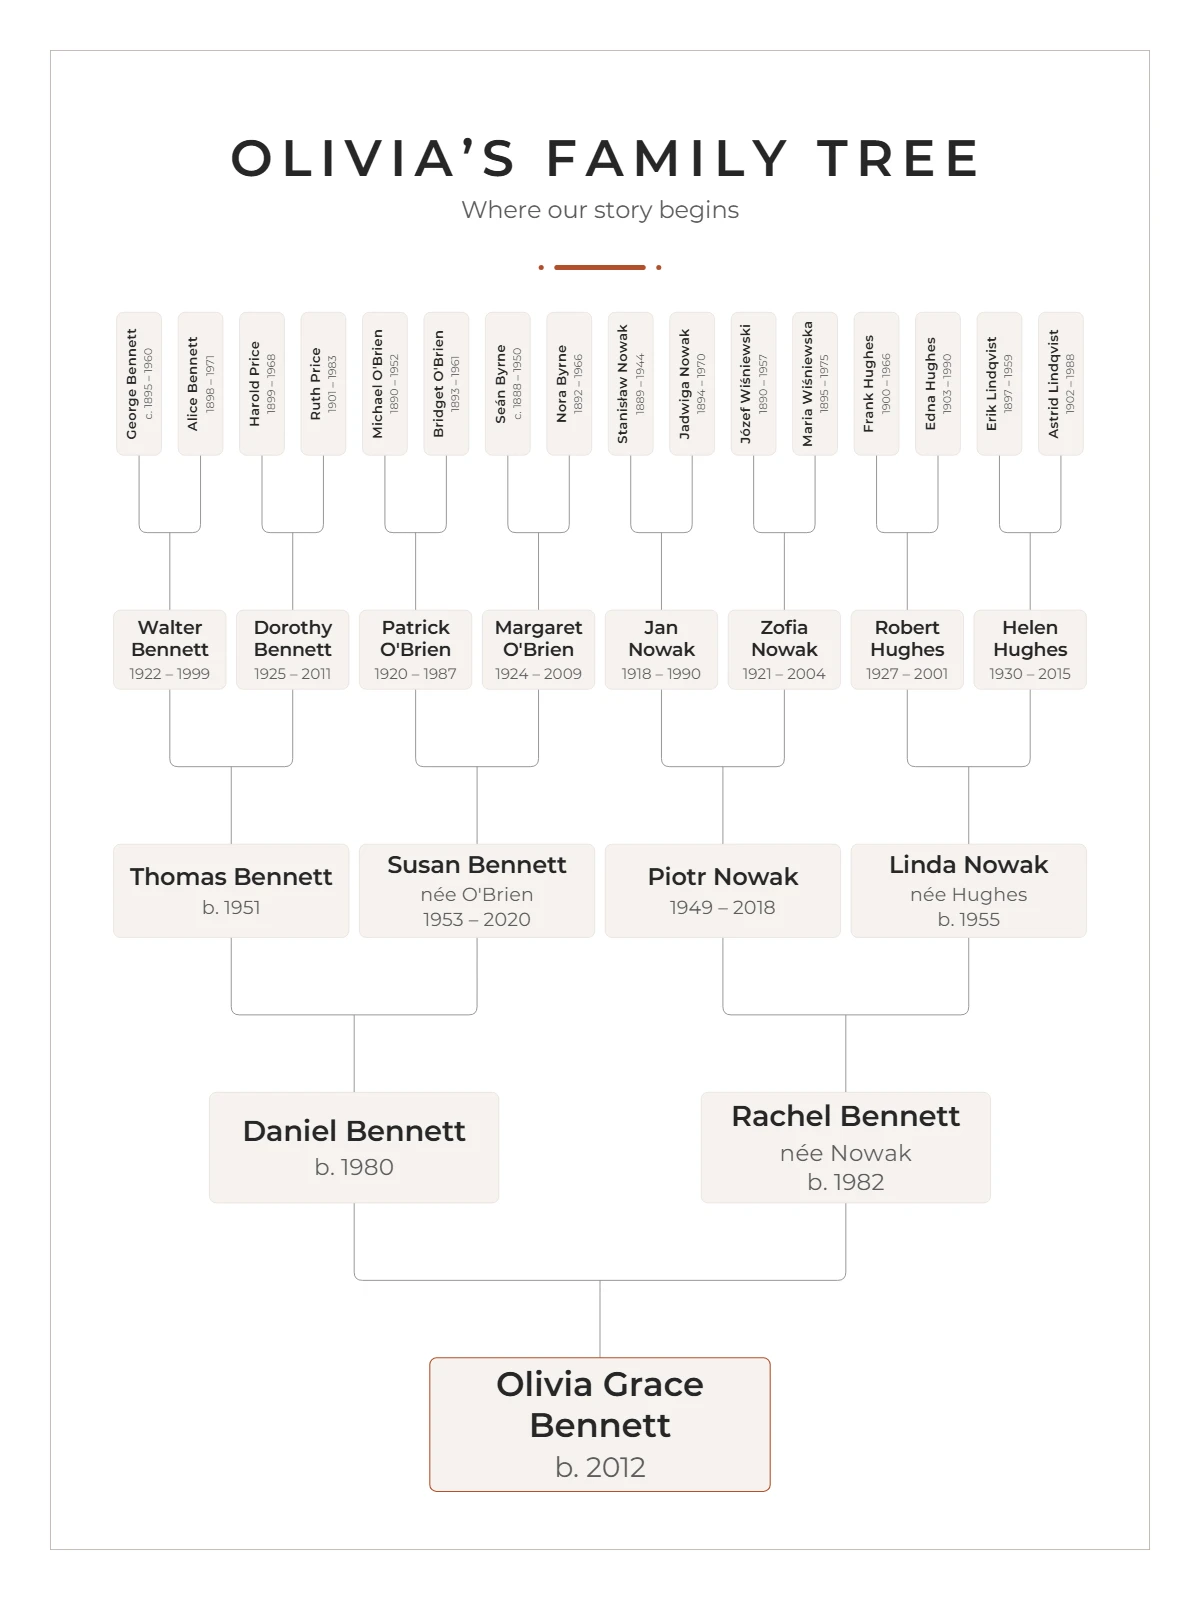
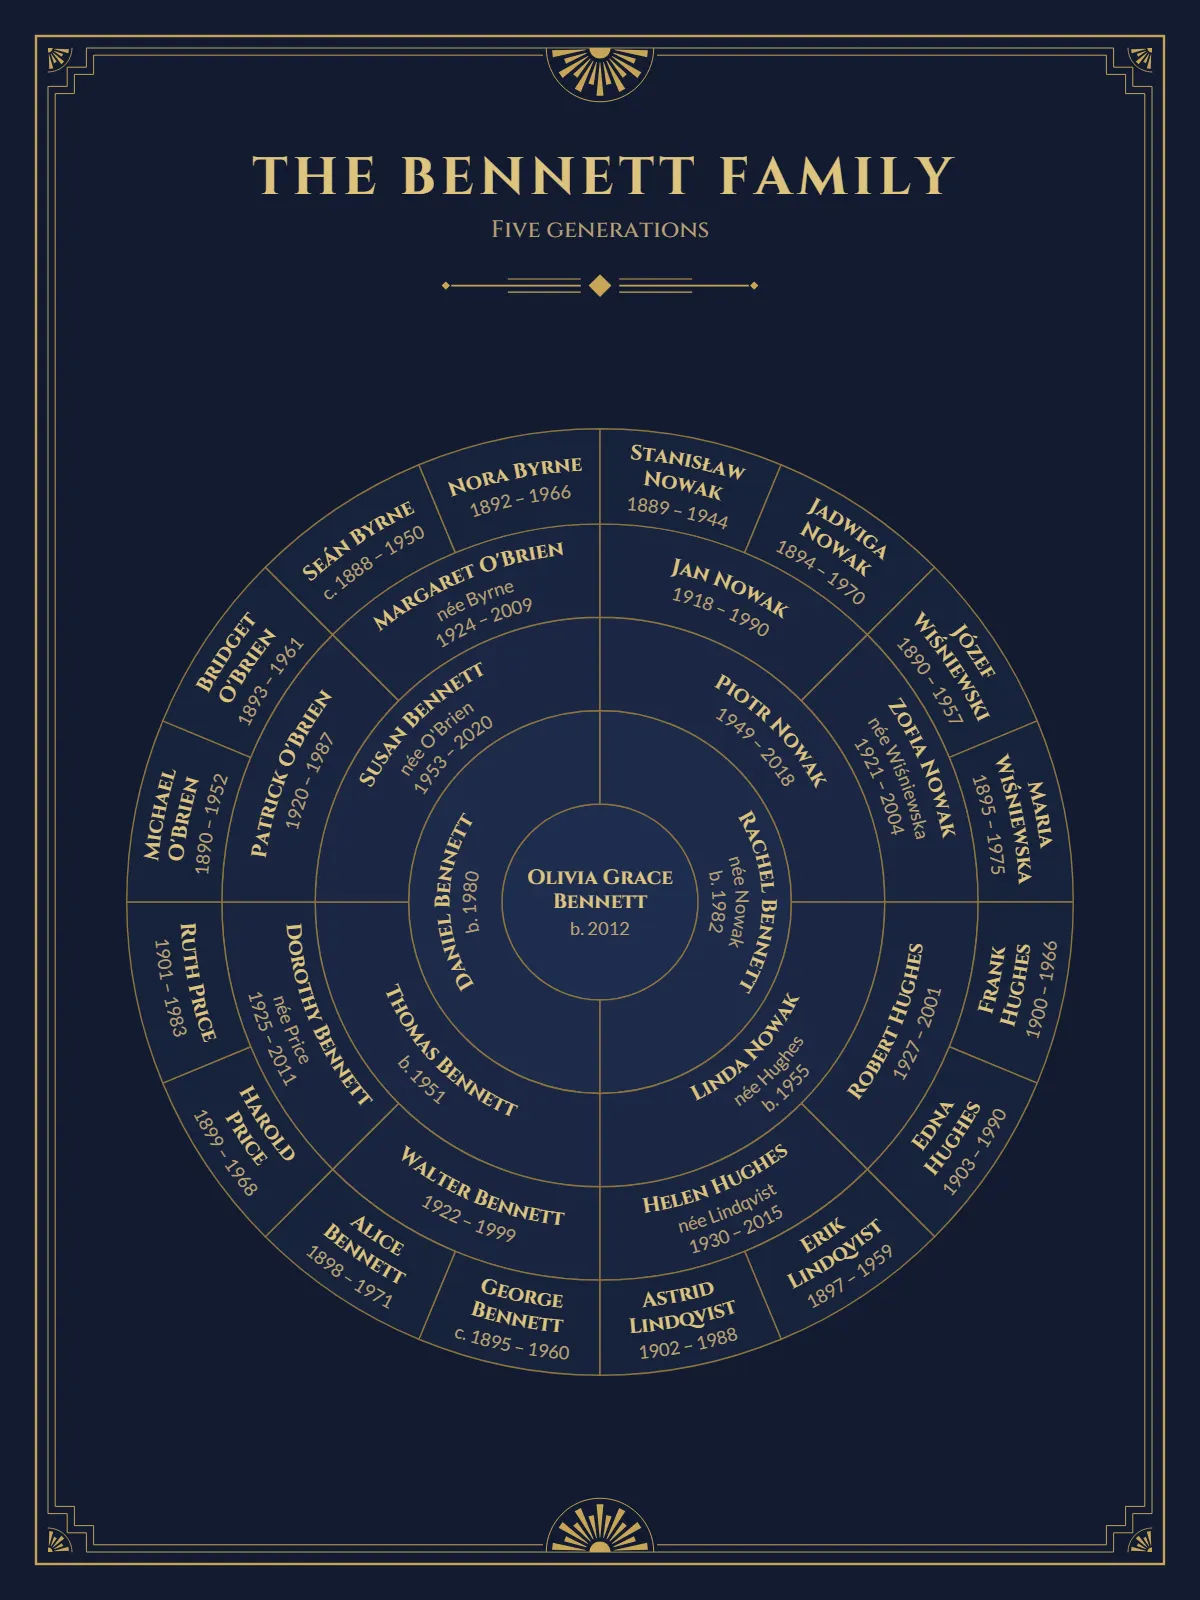
- Looking back from one person: a poster for a new baby, or for someone curious about their roots, traces parents, grandparents and great-grandparents. That's an ancestor (pedigree) chart or, for many generations, a fan chart.
If you're unsure which suits your project, our comparison of fan charts and pedigree charts walks through the trade-offs.
2. Gather names, years and places
For a three-generation descendant tree you'll typically need 15 to 30 people. Start with what you know, then fill the gaps:
- Ask. A family group chat or a phone call to the relative who "knows everything" goes a long way. Ask for spellings, not just names: Katherine or Catherine, Seán or Sean.
- Look at paper. Wedding invitations, funeral programs, the family Bible, christening certificates and old address books are full of exact dates and maiden names.
- Reuse existing research. If someone in the family keeps a tree on a genealogy site or in desktop software, ask them for a GEDCOM file. It saves hours of typing. Here's how to export one from the most common services.
Decide early how much detail each person gets. Birth and death years ("1938–2015") read cleanly on a wall. Full dates are precious for genealogists but crowd the page. Places add a lot of character, especially for families that emigrated, but they take space; on a big tree you may keep them for the oldest generations only.
Keep names as the family writes them, including accents and special letters. They are part of the name, and getting "Wiśniewska" right is exactly the kind of detail people notice.
Handling the delicate parts
Every family has situations that need a decision: divorces and second marriages, stepchildren and half-siblings, adoption, estranged relatives, a child who died young. There's no universal rule. A good guide is to show the family as the person receiving the poster sees it. If you're not sure, ask quietly before you print. It is much easier than reprinting.
Think about privacy as well. If the poster might be photographed and shared online, consider leaving out the birth dates and birthplaces of living relatives. In TreeKeepsake a single switch hides those details for everyone marked as living, while keeping their names.
3. Enter your family, or import it
If you're typing names in, start with the central person or couple and build outwards one generation at a time. It's easier to spot a missing child or a wrong partner when you add a whole family at once rather than jumping around the tree.
If you're importing a GEDCOM file, remember that research trees can hold hundreds or thousands of people. You don't need to tidy all of that. You pick who sits at the center of the poster and how many generations to show, and only those people are drawn.
4. Choose the chart and the number of generations
Generations add up faster than most people expect. In an ancestor chart each generation doubles: four generations means 15 people, five means 31 and six means 63. Descendant trees depend on how many children each couple had, so a large family can fill a page in only three generations.
The rule of thumb is simple: more people need a bigger page, or fewer details per person. Start with the generations that matter most to the recipient. A grandmother looking at her 80th birthday poster cares about her children and grandchildren far more than about her own great-grandparents.
5. Make sure it can be read on a wall
The most common mistake is squeezing in so many people that the names become unreadable. As a guide, names should end up at least 9 or 10 points tall at the final print size to be read comfortably at arm's length, and larger for a poster that people will look at from across a room. TreeKeepsake warns you when the text would print too small for the size you've chosen.
If the page feels crowded, you have four good options, roughly in this order:
- Switch between portrait and landscape. Wide trees often fit much better sideways.
- Hide places, or show years instead of full dates.
- Go up a print size.
- Show one generation fewer, and consider a second poster for the other branch.
6. Pick a style that suits the room and the person
A family tree poster spends years on a wall, so choose a look that fits the home it's going to rather than your own taste. Classic serif lettering on a parchment tone suits traditional interiors and heritage-minded grandparents; clean, minimal themes suit modern homes and nurseries. Dark backgrounds look dramatic but need good printing, so keep them for a quality print shop.
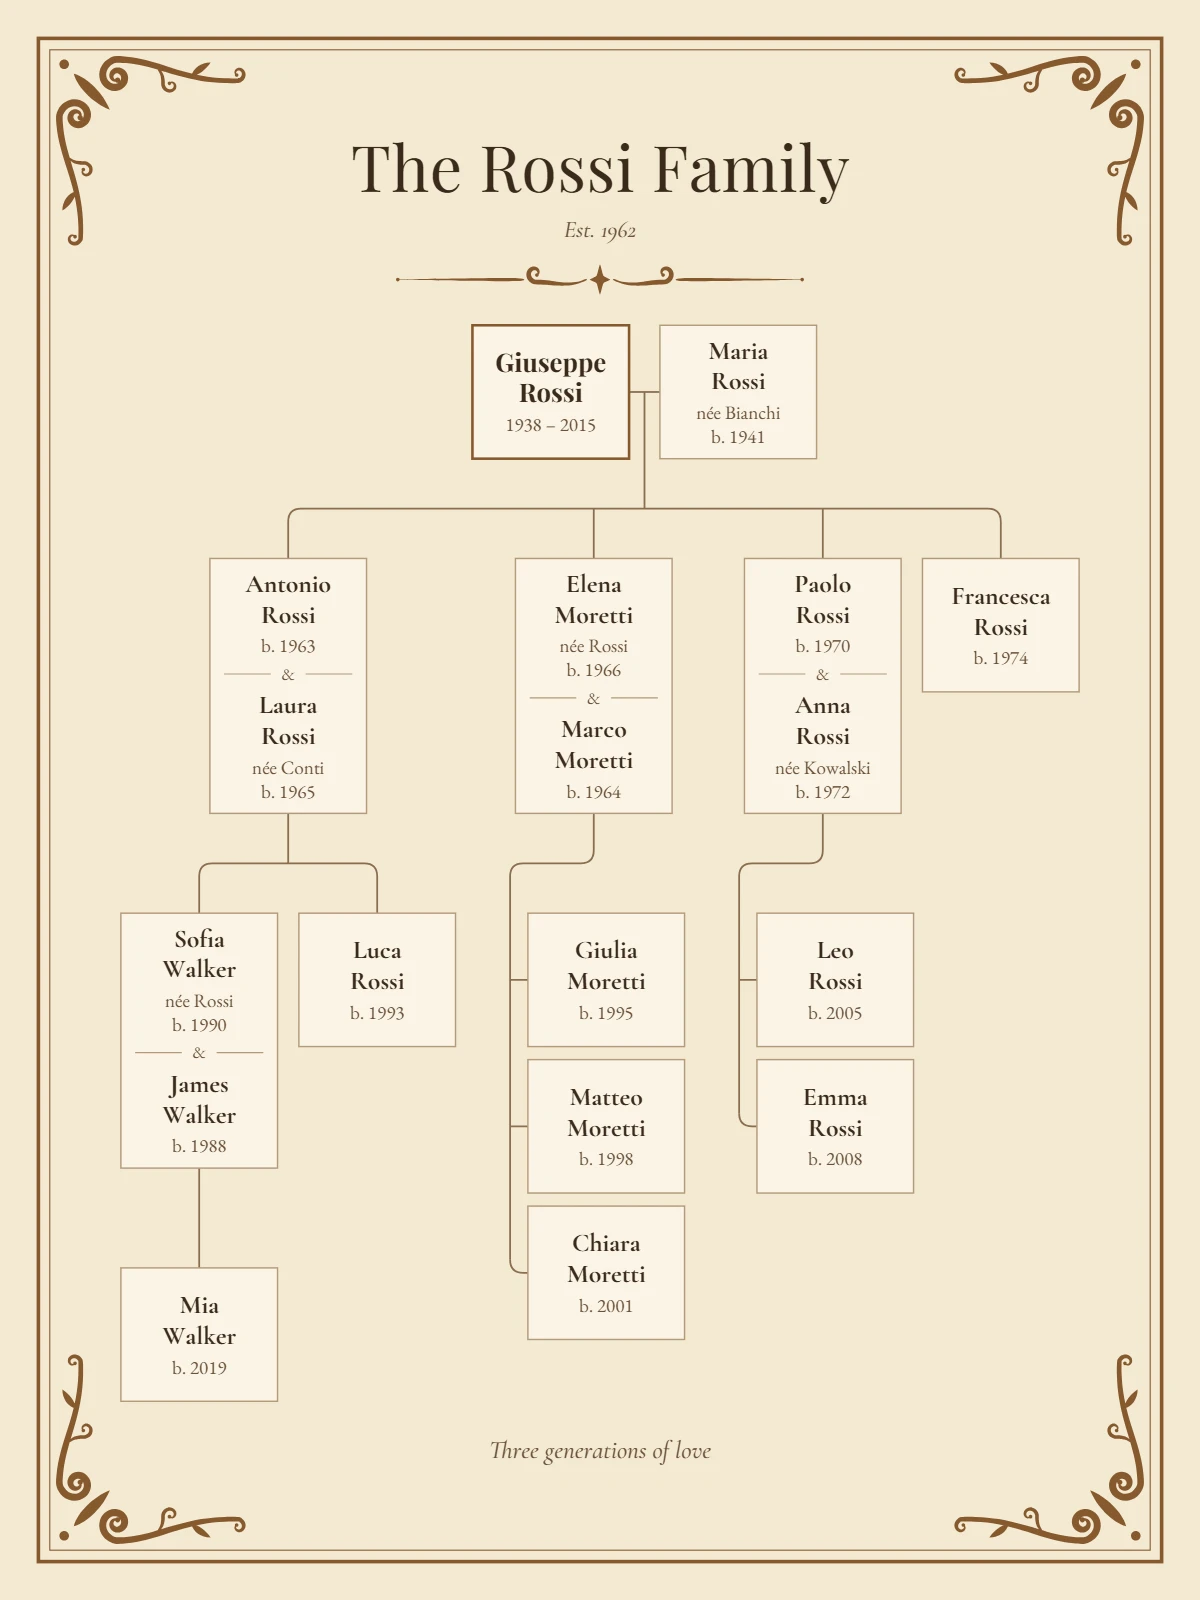
Then write the words. A title is usually the family name ("The Rossi Family"); a subtitle can add a founding year ("Est. 1962"); and a short dedication at the bottom makes it a gift rather than a chart: "Made with love for Nonna's 80th, June 2026".
7. Proofread like it's going on a wall (because it is)
Typos are invisible on screen and glaring in a frame. Before you download, check:
- the spelling of every name, ideally with someone who knows the family;
- years that don't add up, such as a child born before a parent, or a marriage after a death;
- the order of children (usually oldest first) and which partner sits on which side;
- maiden names, nicknames and the title and dedication text.
Then look at the poster at full size, zoomed to 100%, or print a draft on an ordinary home printer. Show it to one trusted relative, just not the person receiving it.
8. Choose the size, download and print
Choose the print size to match the frame you'll use before you download, because the layout is built for the exact shape of the page. Popular choices are 11×14 inches for a shelf or desk, 16×20 or 18×24 inches for a wall, and 24×36 inches for a statement piece; A3 to A1 if you're printing in ISO sizes.
The PDF is the best file to give a print shop because it stays sharp at any size. Allow time for printing and framing, especially before holidays. Our guide to printing a large family tree covers paper, resolution and framing in detail.
A realistic timeline
For most families the work splits into three parts: an evening of collecting names and asking relatives, an evening of building, styling and proofreading, and then a few days for printing and framing, or longer if you order online and need delivery. Starting two or three weeks before the occasion takes the pressure off.
Looking for inspiration for the occasion itself? See our family tree gift ideas.